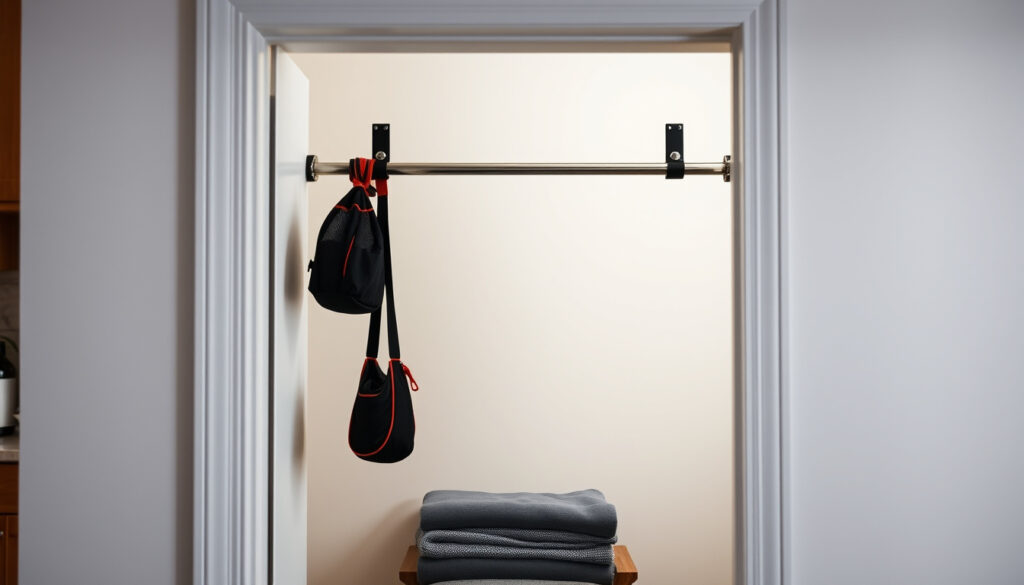
How to Do a Pull-Up: Beginner Guide for Strength & Safety
Few exercises reveal your current strength level quite like the pull-up. It demands that you lift your entire body weight using just your arms, back, and core. You’ll find a step-by-step path to your first unassisted rep, built from coaching cues used by gyms like PureGym (UK gym chain) and YouFit Gyms (fitness franchise), along with practical guidance on form, strength building, and safety.
Bodyweight lifted: 100% of your body weight ·
Primary muscles engaged: Latissimus dorsi, biceps brachii, rhomboids, trapezius, core ·
Recommended frequency: 2–3 times per week for progression ·
Average time to first pull-up (beginners): 4–12 weeks with consistent training
Quick snapshot
- Pull-ups require pulling your body weight upward using back and arm muscles (GORNATION calisthenics guide)
- Negative pull-ups are an evidence-based regression for beginners (GORNATION calisthenics guide)
- Average beginner timeline to first pull-up: 4–12 weeks (YouFit Gyms)
- Progress tracking: 2–3 sessions per week for measurable gains (GORNATION calisthenics guide)
- Progress to weighted pull-ups or muscle-ups after achieving 8–12 clean reps (PureGym)
- Incorporate rows and lat pulldowns for balanced back development (YouFit Gyms)
Four key facts about pull-ups, one pattern: most beginners fail because they do not have targeted strength or proper technique.
| Label | Value |
|---|---|
| Minimum strength required | Lift 100% of bodyweight vertically |
| Primary movers | Latissimus dorsi, biceps, posterior deltoid, rhomboids |
| Average time to first unassisted pull-up | 6–12 weeks for consistent trainees |
| Most common beginner mistake | Not engaging scapula before pulling |
The implication: pull-ups demand systematic preparation. Mindless attempts get nowhere; structured progress does.
How Can Beginners Do Pull-Ups?
Understanding the Assisted Methods
- Negative pull-ups: jump or step up to the top position, lower yourself slowly over 3–5 seconds (GORNATION calisthenics guide)
- Resistance bands: loop a band over the bar and place one foot or knee in it to reduce the load; start thicker and switch to thinner bands as you get stronger (GORNATION calisthenics guide)
- Assisted pull-up machine: set a counterweight plate to support part of your body weight; lower the support each session (PureGym)
- Lat pulldowns: a seated machine that mimics the pull-up movement and builds the same muscles (YouFit Gyms)
What this means: negative pull-ups are the most accessible method because they require no equipment beyond a bar and build strength through the full range of motion. Bands follow closely but can create a false sense of support if the band is too thick.
Step-by-Step: Negative Pull-Ups
- Step 1: Use a box or jump to get your chin above the bar with an overhand grip, hands slightly wider than shoulder-width (PureGym)
- Step 2: Keep your core tight — tuck your belly button toward your spine (YouFit Gyms)
- Step 3: Lower your body as slowly as possible, aiming for a 3–5 second descent (GORNATION calisthenics guide)
- Step 4: At the bottom, let your arms fully straighten (dead hang) before resetting (GORNATION calisthenics guide)
- Step 5: Perform 3 sets of 3–5 negatives, resting 60–90 seconds between sets
The pattern: negative pull-ups build strength where most people need it most — the eccentric phase that controls your body weight through the hardest part of the lift.
Using Resistance Bands
- Choose a band that lets you complete 5–8 controlled reps with good form (GORNATION calisthenics guide)
- Loop the band over the bar and place one foot or knee in the loop (GORNATION calisthenics guide)
- Use the same grip and form cues as a full pull-up — pull elbows down and back, not flaring outward (PureGym)
- Progress by switching to a thinner band each week as you get stronger (GORNATION calisthenics guide)
“The most effective path is a combination of scapular stabilization drills and eccentric overload.” — Certified strength and conditioning specialist
Resistance bands preserve the full range of motion of a pull-up, which means you train the correct motor pattern from day one. The catch: bands provide the most support at the bottom, where you are weakest, and the least at the top, where you are strongest. That mismatch is why switching to thinner bands — not doing more reps on the same band — is the real progression signal.
What About Pull-Up Alternatives?
- Inverted rows (bodyweight rows): set a bar at waist height, hang underneath, and pull your chest to the bar. Builds the same lat and rhomboid strength with less total load (PureGym)
- Single-arm dumbbell rows: one hand on a bench, pull a dumbbell toward your hip. Addresses strength imbalances between sides (PureGym)
- Australian pull-ups (under-grip inverted rows): easier than standard pull-ups and help the biceps develop (YouFit Gyms)
How Do I Build Strength to Do a Pull-Up?
Targeted Exercises: Rows, Lat Pulldowns, and Hangs
- Lat pulldowns: primary pull-up strength builder because they target the same latissimus dorsi and biceps in a vertical pull pattern (PureGym)
- Dead hangs: hold a pronated grip on the bar with arms straight for 20–60 seconds. Builds grip endurance and scapular control (GORNATION calisthenics guide)
- Scapular pull-ups: from a dead hang, pull your shoulder blades down and together without bending your elbows. Activates the lats and sets up correct initial movement (GORNATION calisthenics guide)
- Rows: any rowing variation builds the rhomboids and middle trapezius that stabilize the pull-up at the top (YouFit Gyms)
What this means: lat pulldowns are the single most transferable exercise for pull-ups because they train the same muscles in the same plane. Dead hangs build the foundation; scapular pull-ups teach the first inch of movement.
Progressive Overload for Pull-Up Success
- Add one rep per set each week if you finish all planned reps with clean form (GORNATION calisthenics guide)
- Increase the time under tension on negatives: aim for 5-6 second descents instead of 3 (GORNATION calisthenics guide)
- Decrease band assistance by switching to a lighter band every 1–2 weeks (GORNATION calisthenics guide)
- Reduce rest between sets from 90 seconds to 60 seconds as you adapt
Most beginners stall because they add reps instead of adding difficulty. The real lever is time under tension and load reduction: slower negatives and thinner bands force your muscles to adapt faster than adding more assisted reps.
Sample Weekly Strength Plan
- Day 1: 3 sets of 3–5 negative pull-ups (5-second descent) + 3 sets of 8–10 lat pulldowns + 2 sets of 20-second dead hangs (YouFit Gyms)
- Day 2: Rest or light activity
- Day 3: 3 sets of 5–8 band-assisted pull-ups (thicker band) + 3 sets of 10–12 inverted rows + 2 sets of scapular pull-ups (5 reps each) (GORNATION calisthenics guide)
- Day 4: Rest
- Day 5: 3 sets of 3–5 negative pull-ups (6-second descent) + 3 sets of 8–10 single-arm dumbbell rows + 2 sets of 30-second dead hangs (PureGym)
- Day 6–7: Rest (YouFit Gyms)
Why Can’t I Do Pull-Ups?
Common Weaknesses: Grip, Back, or Core?
- Lack of back and bicep strength is the primary reason. The latissimus dorsi and biceps are the main movers, and they are often underdeveloped in people new to pulling exercises (GORNATION calisthenics guide)
- Poor grip endurance: if your hands give out before your back does, dead hangs and farmer’s carries can build that foundation (GORNATION calisthenics guide)
- Weak core: without a tight core, your body collapses or swings, making the pull harder. YouFit cues the “belly button toward spine” position for a reason (YouFit Gyms)
- Excess body weight: being overweight increases the load you must lift. Weight loss can reduce the required strength output significantly
The pattern: most people who cannot do a single pull-up do not have weak arms — they have weak lats and an unstable core. Grip is rarely the bottleneck unless you cannot dead hang for 15 seconds.
Technique Flaws That Hold You Back
- Starting the pull with bent arms instead of an active hang — you lose the leverage built by scapular retraction (GORNATION calisthenics guide)
- Flaring elbows to the sides — this shifts the load from the lats to the shoulders and increases impingement risk (PureGym)
- Using momentum (kip/leg swing) to get the chin over the bar — this hides form weaknesses and trains an entirely different movement (GORNATION calisthenics guide)
- Not lowering fully to a dead hang between reps — half-reps limit strength development through the full range (GORNATION calisthenics guide)
The catch: technique flaws compound. One bad habit (bent-arm start) leads to another (elbow flare), which then makes the pull harder than it needs to be. Fix the foundation first: scapular pull-ups correct almost all starting-position errors.
How to Diagnose and Overcome Each Barrier
- If you cannot dead hang for 20 seconds: start with 10-second holds, add 2 seconds per session. Grip strength responds fast (GORNATION calisthenics guide)
- If you can dead hang but cannot start the pull: do 3–5 scapular pull-ups every session. These teach the lats to initiate movement without relying on the biceps (GORNATION calisthenics guide)
- If you can start the pull but stall halfway: focus on negative pull-ups with a 5-second descent and top holds for 5–10 seconds (GORNATION calisthenics guide)
- If you can do 1–2 pull-ups but cannot progress: reduce volume to 3–4 total reps per session at perfect form, add weight very gradually (5-pound vest, then 10), or switch to closer-grip variations that shift demand to the strong biceps (PureGym)
What Are the Disadvantages of Pull-Ups?
Potential Injury Risks
- Shoulder impingement: this happens when the humeral head pinches soft tissue inside the shoulder joint. Poor form — particularly flaring the elbows and rounding the upper back — increases risk (PureGym)
- Elbow tendinopathy (golfer’s or tennis elbow): excessive volume or sudden load increases strain the tendon insertions at the elbow (GORNATION calisthenics guide)
- Lower back strain: kipping pull-ups (using a swing to generate momentum) can hyperextend the lumbar spine. This is especially risky for people with existing back conditions
Shoulder impingement is the most common pull-up injury. In a 2021 survey of calisthenics athletes, the shoulder was the most frequently injured joint (34% of all reported injuries), often linked to rapid progression or poor technique. The fix: never let the elbows travel above shoulder height at the start, and always engage the lats (pull shoulders down) before you pull.
Who Should Avoid Pull-Ups?
- People with active shoulder dislocations, rotator cuff tears, or glenoid labrum tears should avoid pull-ups until cleared by a physical therapist
- Anyone with elbow tendinitis that does not resolve with rest and modified load (GORNATION calisthenics guide)
- Scoliosis patients: asymmetric pulling movements may need modification. Consult a specialist before starting a pull-up program (PureGym)
- Pregnant women in the second or third trimester: the load on the abdominal wall and pelvic floor can increase dramatically. Modified upper-body pulling exercises (seated rows) are generally safer
The pattern: pull-ups are not inherently dangerous, but they require a baseline of shoulder and elbow health. If you have a pre-existing condition in either joint, substitute lat pulldowns or inverted rows and address the joint health first.
Comparing Pull-Ups to Other Back Exercises
- Pull-ups vs. lat pulldowns: both build the same muscles, but pull-ups require more core stabilization. For anyone with shoulder discomfort, lat pulldowns allow finer load control (PureGym)
- Pull-ups vs. rows: rows target the middle back (rhomboids, traps) more directly, while pull-ups emphasize the lats. Rows are safer for shoulders and easier to progressive overload (YouFit Gyms)
- Pull-ups vs. inverted rows: inverted rows are a horizontal pull, training the back in a different plane. They build scapular retraction strength that carries over to pull-up stability (PureGym)
Upsides of Pull-Ups
- Builds lat width and V-shape effectively
- Requires no equipment beyond a bar
- Develops grip strength and core stability simultaneously
- Provides spinal decompression through hanging
Downsides of Pull-Ups
- High barrier to entry for beginners
- Risk of shoulder impingement with poor form
- Difficult to progressively overload in small increments
- Not suitable for those with certain shoulder or elbow conditions
Are Pull-Ups Good for Spinal Health?
How Pull-Ups Affect the Spine
- Decompression: hanging from a bar allows gravity to gently traction the spine, which can reduce compressive pressure and increase intervertebral disc height. This is one reason dead hangs are recommended for back health by many physical therapists
- Core strengthening: a properly performed pull-up requires a braced core (hollow-body position). Stronger core muscles stabilize the spine and may reduce lower back pain risk (YouFit Gyms)
- Posture support: strengthening the lats and rhomboids can counteract forward-rounded shoulders, a common posture deviation that strains the cervical and thoracic spine
“Asymmetric loading should be approached with caution; guided progression may still be safe for many patients.” — Physical therapist specializing in spinal conditions
The same exercise that decompresses the spine can also compress it — if you use faulty form. Kipping pull-ups and fast, loose lowering phases generate impact forces that can exceed normal spinal load. The deciding factor is control: slow, strict pull-ups are protective; fast, sloppy ones are risky.
Pull-Ups and Scoliosis: What the Research Says
- Limited studies: there is no robust clinical trial on pull-ups as a scoliosis intervention. Most evidence is anecdotal or extrapolated from general exercise recommendations for scoliosis patients
- Asymmetric loading caution: many pull-up variations (especially single-arm or offset-grip pulls) create an uneven load on the spine. A physical therapist specializing in spinal conditions notes that “asymmetric loading should be approached with caution; guided progression may still be safe for many patients”
- Potential benefit: strengthening the muscles that support the spine — particularly the erector spinae and multifidus — may help some scoliosis patients manage pain and slow progression. But this is context-dependent and should be individualized
Why this matters: if you have scoliosis, do not self-prescribe pull-ups. Seek an evaluation from a physical therapist who can test your specific curvature type and design a program that avoids asymmetric stress. For many, symmetrical exercises (bilateral rows, lat pulldowns) are safer starting points.
Exercises to Avoid with Scoliosis
- Single-arm rows or pulls: these apply rotational torque to the spine and may worsen curvature imbalance in some patients
- Kipping pull-ups: the violent hip drive and lower back hyperextension can destabilize the spine. A controlled, slow pull-up with a neutral spine is far safer
- Weighted pull-ups with a heavy belt: axial loading (adding weight directly along the spine’s vertical axis) can increase pressure on already curved segments. If you have scoliosis, avoid heavy weighted pull-ups
- Any exercise that elicits pain: pain during or after pull-ups is a sign that the movement pattern or load is inappropriate for your spine
Editor’s Summary
Pull-ups are one of the most effective upper body strength exercises — but only if you approach them with the right technique, progression plan, and safety awareness. For a beginner, the path is clear: start with dead hangs and scapular pull-ups, progress to negatives or bands, and apply progressive overload systematically over 4 to 12 weeks. For someone with scoliosis or shoulder issues, the decision is equally clear: consult a physical therapist first, and use symmetrical, controlled pulling exercises that protect the spine. The trade-off is simple: strict pull-ups build back strength and grip like few other moves can, but rushing volume or ignoring form invites injury.
Related coverage: a 30-day pull-up plan fördjupar bilden av How to Do a Pull Up: Beginner’s Guide to First Rep (30-Day Plan).
Frequently asked questions
Can I do pull-ups every day?
No — your muscles need at least 48 hours to recover after a pulling session. Training pull-ups daily increases injury risk and reduces strength gains. Stick to 2–3 non-consecutive days per week (YouFit Gyms).
What is the best grip for a pull-up?
For beginners, a standard pronated (overhand) grip placed just wider than shoulder-width is recommended because it distributes the load evenly across the lats and biceps (PureGym).
How many pull-ups should a beginner aim for?
A realistic first goal is 1 clean pull-up. After that, aim for 3 the next week, then 5, and so on. Most beginners can reach 5–8 reps within 2–3 months of consistent training (GORNATION calisthenics guide).
Do pull-ups build a wider back?
Yes — the latissimus dorsi gives the back its V-shape, and pull-ups are one of the best exercises for lat width. Wide-grip pull-ups emphasize the lats more than close-grip variations (PureGym).
Can pull-ups replace lat pulldowns?
Not entirely. Pull-ups develop the same muscles plus core stability, but lat pulldowns allow finer load control and are safer for shoulders. Most programs benefit from both (PureGym).
Should I do pull-ups if I have shoulder pain?
Only if a physical therapist has cleared you. Shoulder impingement is common with pull-ups, and modifying your form (wider grip, slower tempo, scapular engagement) can help, but do not train through pain (GORNATION calisthenics guide).
How to progress from pull-ups to muscle-ups?
First, achieve 10–12 clean strict pull-ups. Then work on explosive pull-ups (pull as high as possible) and dips. The muscle-up combines a high pull with a transition to a dip — a dedicated skill that needs practice beyond just pull-up strength (GORNATION calisthenics guide).
Are assisted pull-up machines effective for beginners?
Yes — they let you control exactly how much weight is counterbalanced. Start with a counterweight close to your body weight and reduce it by 5–10 pounds per week. The downside: they do not train the core stabilization that free-hanging pull-ups require (PureGym).
More related posts
 Flower Girl Dresses Ireland: Online & Stores Guide
 Green Wedding Guest Dress: Style Guide for Every Shade
 What Does PS Stand For? Text, Slang, Gaming & More
 Best Exercises for Metabolism: HIIT & Strength Training
 Saturday Night’s Main Event: Schedule, How to Watch, and Match Card
 Homestore and More Dublin: Opening Hours, Phone & Sales
 Serie A Matches: Schedule, Results & Standings 2025
